Having reviewed the requirements for those facets of the project for which we were responsible, and having formulated design specifications for the deliverables, the next major step was to finalize space and equipment configuration at the Studios for completing the work. And, as always, that led us to the first of the whiteboard discussions that would focus on the project. That first session focused primarily on housing the spraying and drying of the panels, because, of all the routine things to which studio space is allocated in its ongoing operation, spraying approximately 250 square feet of panels isn't something we do every day.
While securing space away from the studio might sometimes seem desirable, the endless costs of doing so usually put that option at the bottom of our list. Also near the bottom is the option of improvising a structure, but even if code permits and the elements don't blow it away or melt or freeze the occupants and the work, it's a risky choice. In view of these considerations, and given the fact that the severest months of winter stretched across our involvement in the project, we opted to improvise a tent inside the shop.
This approach gave us about 70 square feet of space within the existing footprint of the studio.
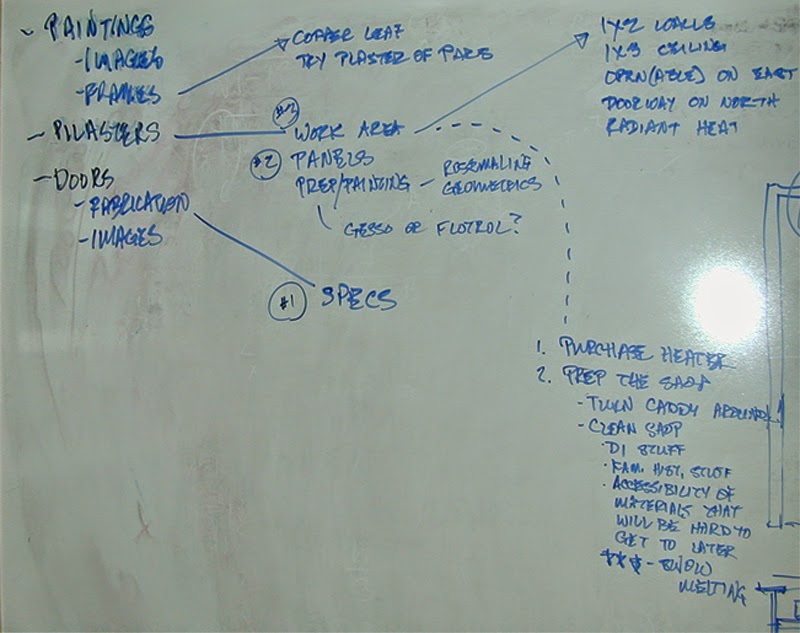
Deliverables are listed at the left. Items in the middle column are dependencies requiring immediate resolution. Numbers in the middle column indicate priorities among the dependencies. From work area, in the middle column, arrows to the third column outline parameters governing the design of the tent (the five items listed at the top of the board) and tasks to be completed (items listed at the bottom of the board) preparatory to creating the spray tent.
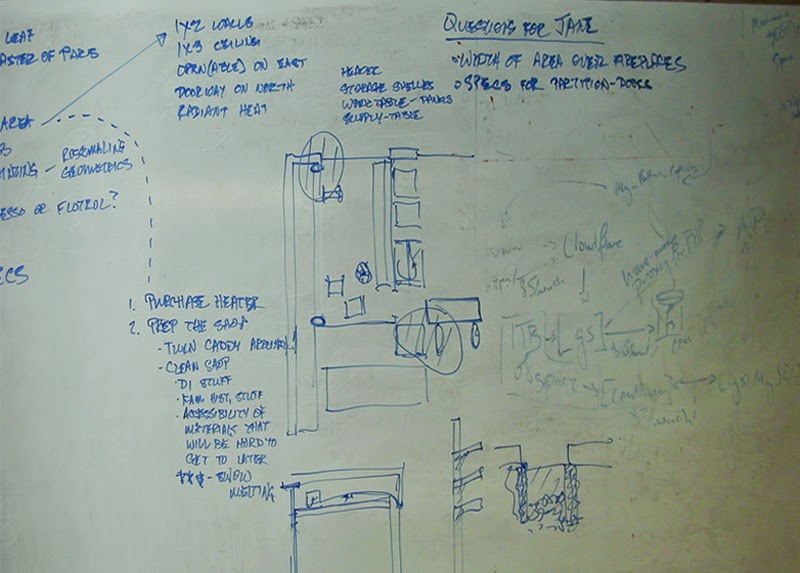
The drawing in the center of the foregoing image is a tentative map of the work area to be enclosed by the tent. At the bottom of the board is a side view of brackets to be provided for storing panels. This part of the session moved toward conceptualizing the workspace and its relationship to work flow in the surrounding shop.
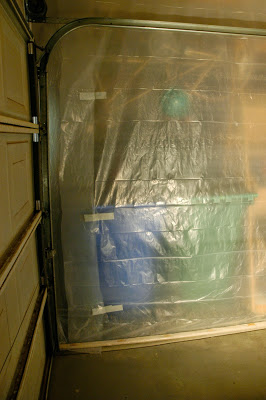
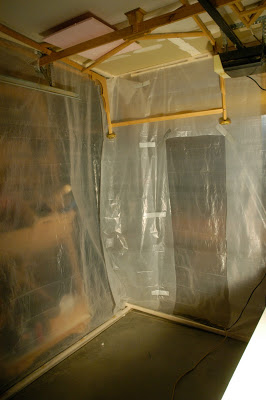
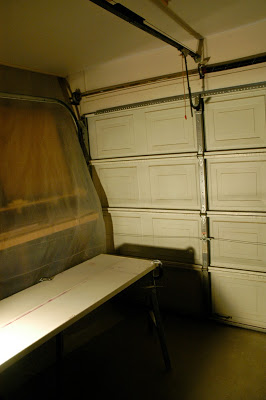
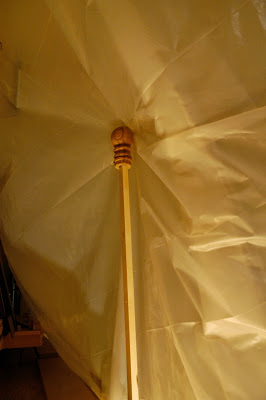
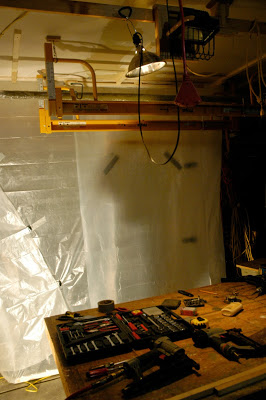
From the whiteboard session, we embarked on preparing the space itself, which included adding a receptacle to an electrical circuit we had routed out to the shop so that the added burden of tools and lighting occasioned by the tent would not overburden existing circuits. The following series of photos showing the completed tent from the inside also show design considerations in the placement and fabrication of the workspace. For example, having a garage door at the south end of the tent allowed for easy access to the space and, because of the south-facing metal door, direct sunlight during the winter helped heat the space. Lengths of 1x2s secured the polyethylene plastic sheeting to the wall and ceiling. Along the floor, the edge of the sheeting was wrapped around another 1x2 to define and stabilize the bottom edge of each floating partition.
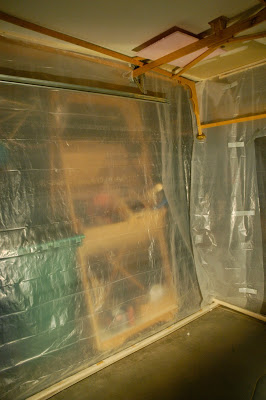
The edge of the plastic sheet hanging from the ceiling is not secured to the wall. Instead, a strip of plastic sheeting is secured to the wall by a 1x2, and duct tape secures the strip to the suspended sheet. We did this in case we decided to keep the tent, after completing the project, and store it merely by rolling up the wall panels and securing the rolls to the ceiling. (In the end, we decided not to keep the tent, but to provide for the function elsewhere.)
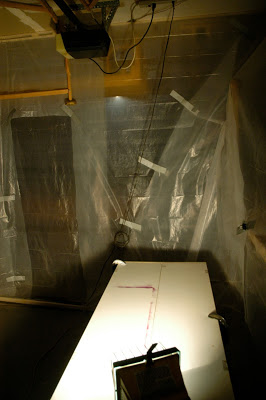
On the floor at the corner of the tent, 1x2s for the two partitions shown are clamped together so that the bottom corner of the tent does not move. Items on the ceiling have nothing to do with the tent, but are part of the ceiling storage in the shop. The wooden items stored on the ceiling tracks are pieces of the diptych easel.
Strips of duct tape in the photo secure the corner of the tent, where the two partitions meet. The passage is cut into the partition opposite the garage door, and the passage is covered by a flap or plastic sheet suspended from the ceiling along with the partition. Like a tent flap, the flap is open on both of its sides to facilitate traffic flow and workspace use on both sides of the passage.
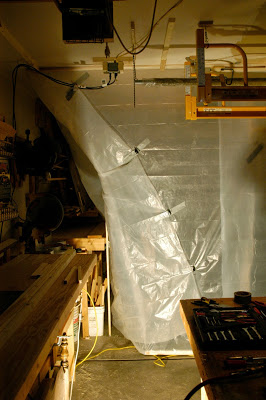
The duct tape in this photo secures the other corner of the passage-wall, pulling the corner away from the nearby wall to allow space for use of the chop saw situated there.
Back at the garage door, the plastic sheeting, suspended from the ceiling, falls over the south end of the chop table and the wood storage occupying that end of the shop. This panel of the tent is not secured to the wall and is not weighted at the bottom by a 1x2 because the plastic serves as a curtain. Because the wood storage had to be as conveniently accessible as possible during the life of the project, we needed ongoing access to it, which would have been hindered by a 1x2.
Taken from outside the tent, this photograph shows the chop table that extends across the length of the east wall of the shop. The corner of the tent is drawn back from the chop saw to allow access to it and the table top.
Clamped to the face of the chop table, this 1x2 topped with a spare piece of turned-work (to keep the 1x2 from puncturing the plastic sheet) holds back the tent wall from the work area.
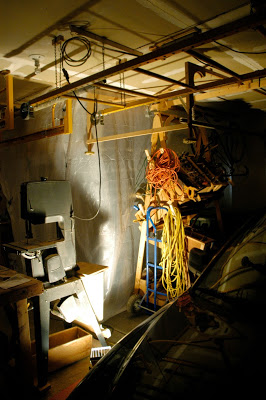
In this photo, the tent passage is directly beyond the band saw. The corner of the tent is next to the tool caddy we call the trebuchet. Once again, the scaffolding and ceiling-storage in the shop are visible overhead.
Drying brackets, at left in the foregoing photo, provided convenient panel storage. The table top on the sawhorses is a piece of pressboard.
The tent served very well. We kept it a while after the project concluded, and used it for more than we had anticipated; so much so that we embarked upon a more permanent way of housing its uses.