Ideas, presented in the Newsroom, concerning housing, mounting, and accessorizing power tools are not certified in any way as being safe. Before doing anything of this kind--whether or not it involves implementing any of these ideas--consult whatever authoritative sources you need to for the purpose of satisfying yourself that whatever you might choose to do in such regard is safe.
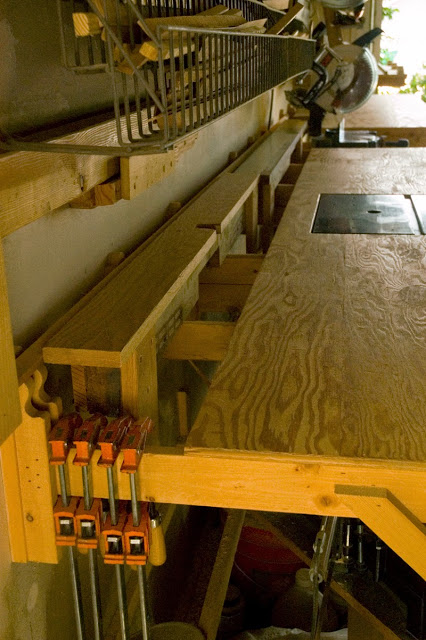
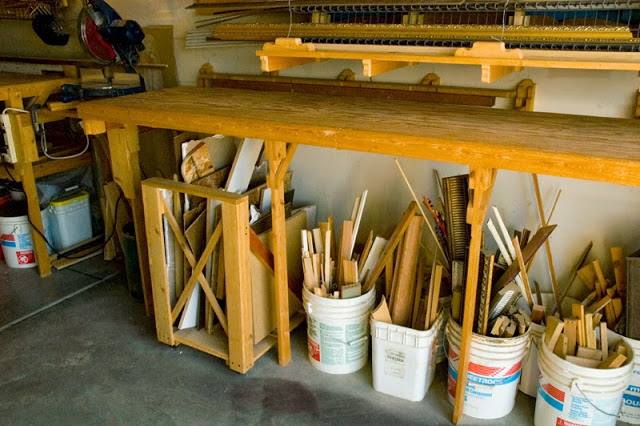
The chop table along the east wall of the shop is 18 ft. 8 in. long and 32.5 in. deep. The surface is made of 0.25-in plywood supported by 1x3 ribs secured to studs. Along the back of the table, the table top ends 8.5 in. from the wall.
In the middle of the chop table (near the top of the photo), a space between the two halves of the table accommodates a chop. The black metallic rectangle recessed into the top of the foreground table is a small, free-standing router table.
The table top in these photographs is secured so that the surface is free of nail and screw heads. Table members secured to studs are secured by grabbers.
This view down the length of the chop table shows the horizontal ribs of the table top, near the wall, where they are attached to studs by means of a bracket like the one immediately to the left of the bar clamps in the bottom left of the photo. The 8.5-in. gap along the back of the table allows for clamping anywhere along the back of the table. The gap also prevents build-up of wood-chip debris on the table top. The gap and horizontal ribs along the back of the table also serve as a rack on which items can be stored. In this photo, the two pieces of the planer made for the router table, rest on the exposed ribs behind the table top.
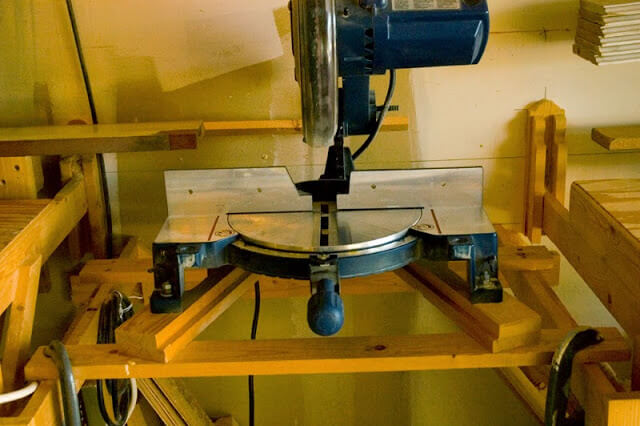
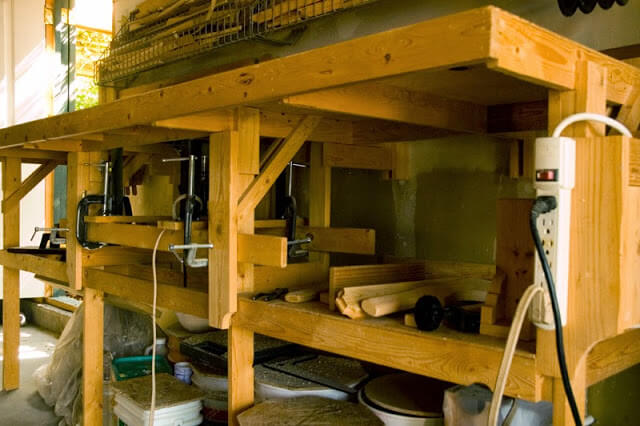
In the space between the two halves of the chop table, runners are anchored to studs at the back of the cavity and to chop-table legs at the front, so that a chop saw, bolted to a wooden platform, can be clamped in place. Because the wooden platform can be built in various ways and to various heights, a chop of almost any size can be made to fit the space and, when clamped in place, be flush with the table top.
This chop, mounted to a wooden platform that reconciles its table top with the top of the chop table (when clamped in place at the center of the chop table), hangs from wall brackets secured to studs.
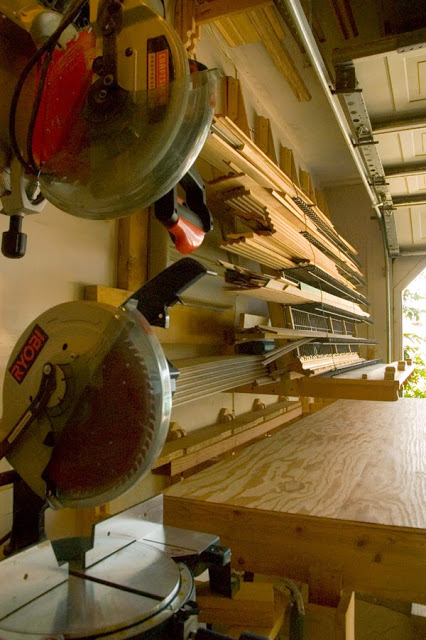
From the center of the chop table, this photograph looks toward the far end of the table. Once again, the gap between the back of the table and the wall is used for storage, in this case the storage of two straight-edges sometimes used as fences and sometimes as straight edges. Built out from the wall above the top of the chop table is a wood-storage easel that maximizes the space and helps ensure that the top of the chop table remains clear.
This view of the area under the far end of the chop table shows the scrap storage that is kept there in buckets as well as on the trolley reserved for flat pieces of such materials as hardboard, plywood, MDF, and drywall. We keep everything in buckets because, like a drawer, they can easily be pulled out from under the table for searches, pulled out for cleaning and spraying, rearranged (along with the scrap buckets under the workbench), and protect their contents from damage if water accumulates on the concrete floor.
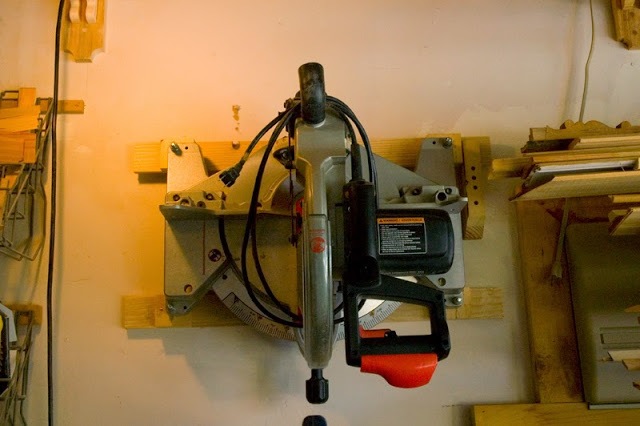
Under the other side of the chop table, items on the floor are also stored in buckets. The shelf behind the power strip is devoted to router accessories. The shelf, at the same level and on the far (left) side of the router, is devoted to a hand-operated miter-saw box. The wall above this side of the chop table is home to the wire scrap-baskets.
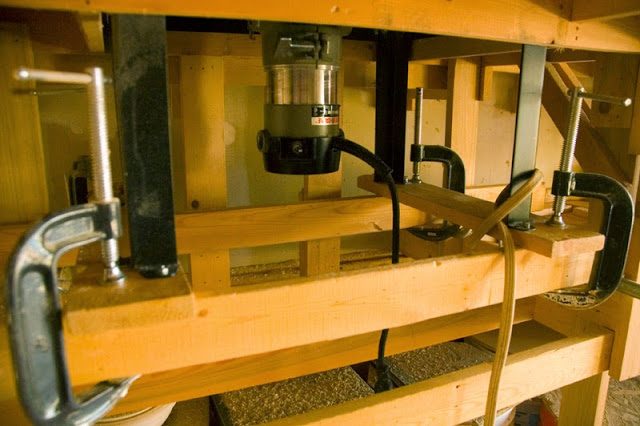
Like the chops, the router table is bolted to a wooden platform that is then clamped in place below the table, meaning that not only can the router be removed from its collar, which is bolted to the small metal table, but the small metal table can be removed. That is why there are two sets of C-clamps around the base of the metal table. One set clamps in place the wooden runners upon which rests the wooden runners bolted to the feet of the metal table. The other set of clamps makes it possible to lower the wooden runners supporting the bolted-to-the-table runners.