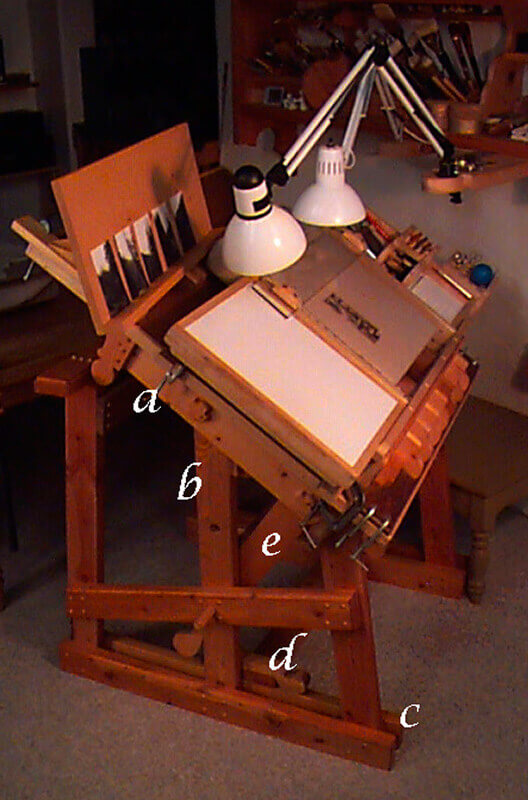
Labels in this photograph mark the under-carriage (a) screwed into the table top, into which the top of the two simple legs (b) attach to the table top by means of a pin, which allows the table top to tilt. Those simple upright legs (b) are secured to the middle of a runner (c) on either side of the table. Originally, each runner consisted only of a solitary 2x4. A horizontal brace (d) also serves as a foot rest between the legs. A diagonal brace (e) at each original leg supported the table top when tilted or level. The round hole in the middle of the upright leg (b) just below the b secures the brace (e) when the table top is positioned horizontally. In the photo, the pin inserted into b holds the table in position when tilted.
In January 1981, I built a drawing table to have a custom workspace dedicated to pencil drawing. The table-top, made from a piece of quarter-inch hardboard laminated to a three-quarter-inch piece of pressboard, had once served as a restaurant table. We had rescued it from a derelict garage a couple of years before, and the 2x4 legs, platform, and under-carriage that I made for it came from the salvage of a stud wall recently removed to extend the second-story studio floor all the way to the eave of an attic roof.
Then, in January 1996, when I accepted Wayne Kimball's invitation to experiment with lithography, I modified the drawing table to accommodate the 100-lb. slabs of Bavarian limestone on which I wanted to draw images for limited-edition prints. Having pursued pencil drawing since early childhood as my primary medium of artistic expression, my modifications to the table focused not only on accommodating the stones, but a drawing technique that had developed over the better part of 40 years.
The time subsequently spent on lithography as a primary medium of expression more than justified these attentions to workspace convenience, not to mention safety. This configuration also greatly facilitated concentration on the artwork, and made it possible to make the most of slivers of time, when only slivers were available, because the work area was regularly ready to use with almost no set-up, and its maintenance was essentially built into its use.
To that original construction, I added another piece of hardboard to refresh the table top and trimmed the sides of the tabletop with alder and plugs. Drawings were created while taped to pieces of hardboard that rested, in turn, on the table top by means of a ledge. This made it possible to work concurrently on multiple drawings.
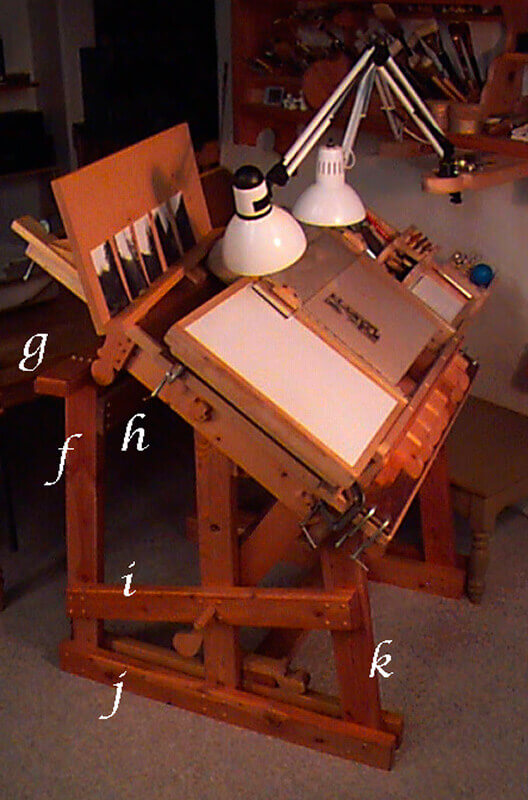
This version of the photo labels the framework added to the original table to support the limestone slabs. The upright (f) is one of two posts at the front or top of the table that support the table top in its horizontal position. Horizontal braces (g and h) connect the post shown (f) with its counterpart on the opposite corner of the framework. The diagonal brace (i) supports the three legs of the framework (f, k, and b (in the previous photo)). An additional runner (j) stabilizes the uprights. A short upright (k) supports the table top when tilted. A horizontal brace from the top of k to its counterpart adds additional stability to the two short posts.
One of the primary benefits in being able to bring the table top into a horizontal position higher than its tilted (drawing) position, was not having to jeopardize one's back by lifting the stone from the lower position.
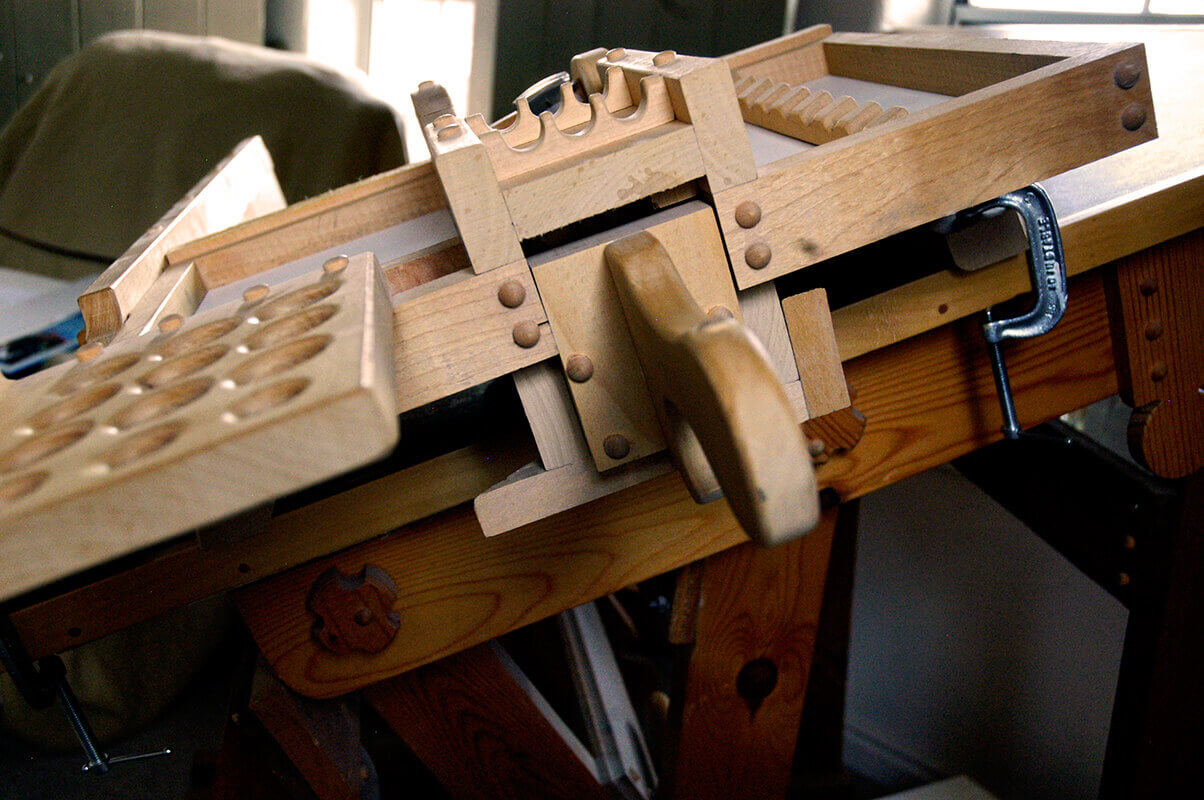
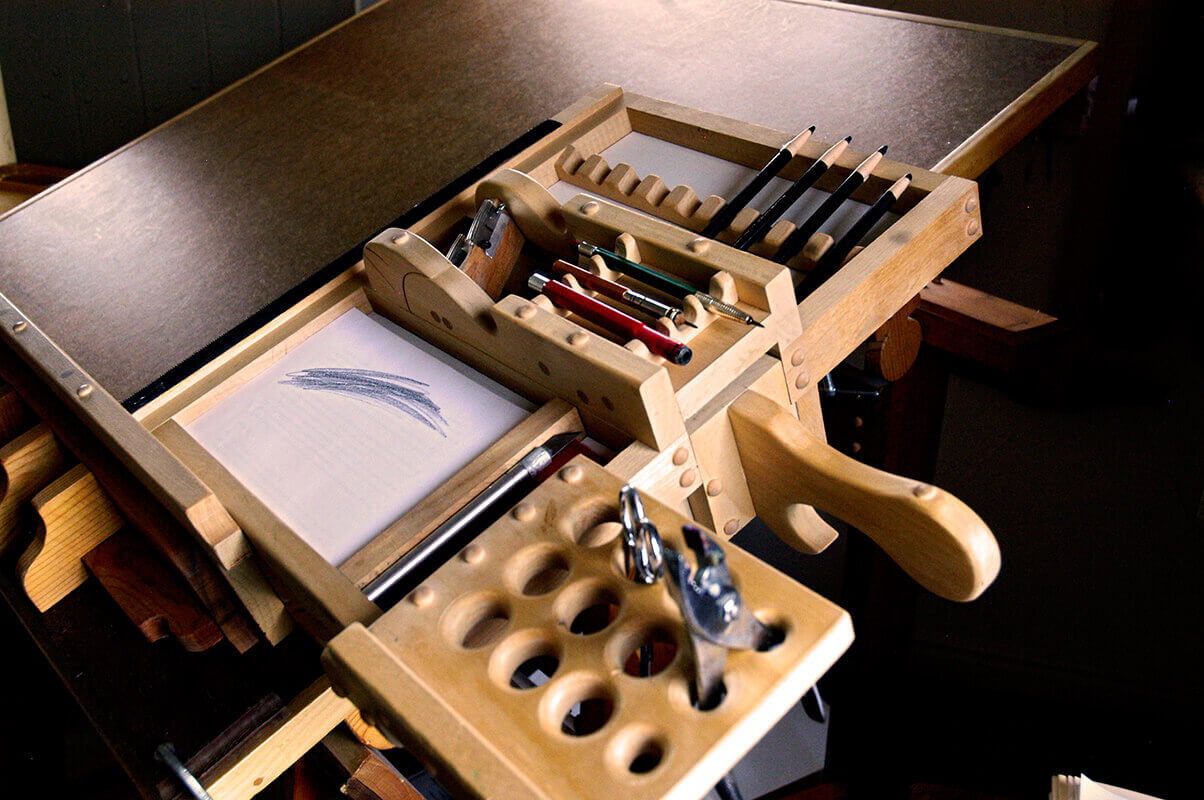
The next version of this photo labels the table-top accessories created for convenience in drawing on the stones.
The easel (l) clamped to the top of the table provides a shelf for reference material involved in the drawing. The ledge or shelf (m) at the base of the table top is clamped there (note the C-clamps at each side of the ledge) to hold in place the stone. A tool caddy (n) clamps to the table top, to the right of the stone, and provides convenient storage for tools and supplies involved in drawing. The flat surface (o) to the left of the stone functions much like the easel (l). The round wooden blocks (p) at the base of the stone allow a hand-hold access to the stone so that it can be lifted or set in place with less risk to one's hands. The quarter-inch thick piece of glass (q) serves as a bridge to keep hand oils from affecting the stone, and to protect wax drawings on the stone from being smeared.
The following photographs show detail concerning the construction of the components around the stone and the sequence in which they were configured on the table top.
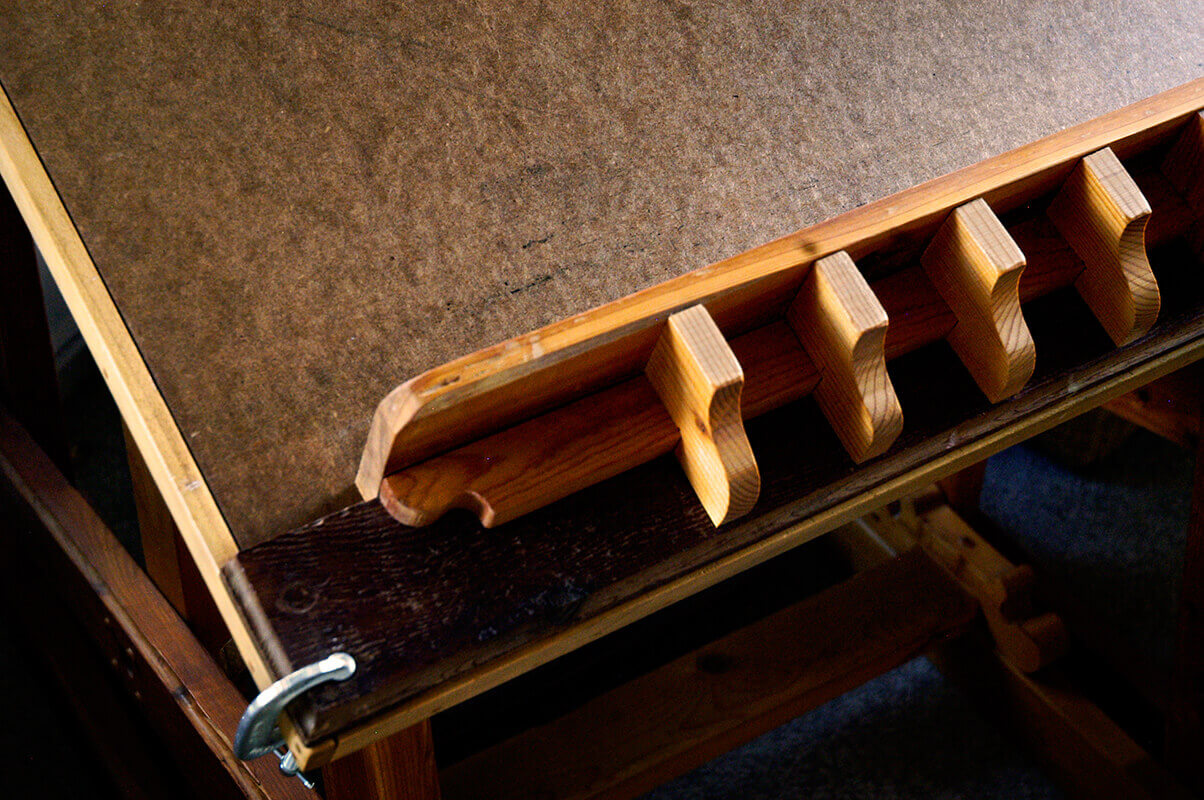
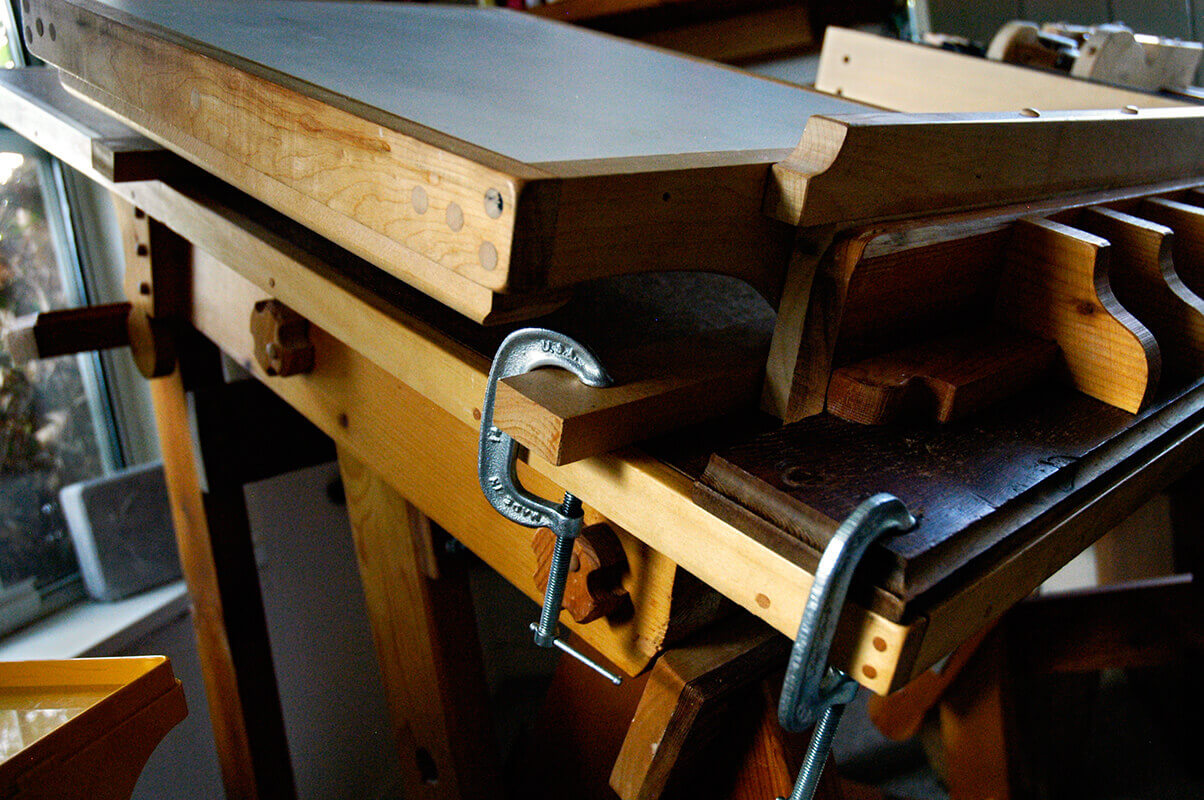
The load-bearing ledge is clamped in place at the bottom edge of the table top.
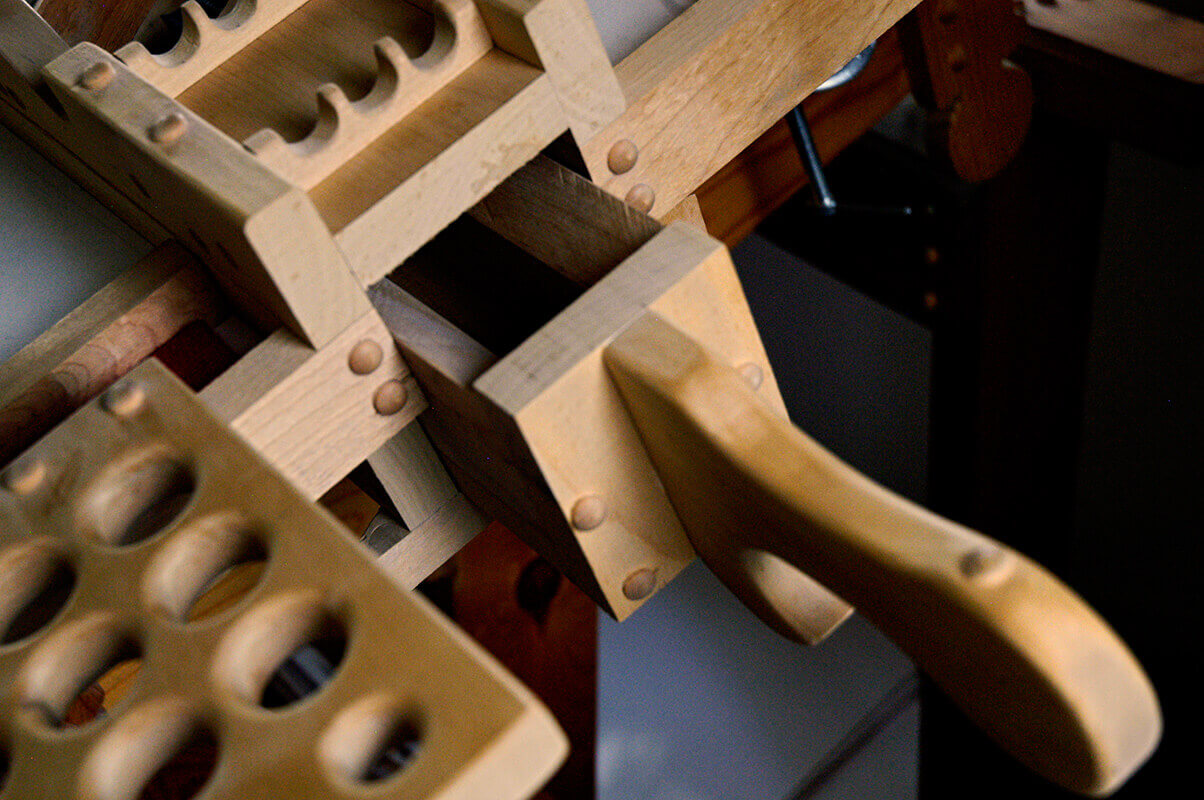
A hand rest -- extending the length of the ledge -- is placed between the load-bearing ledge and the tool caddy. The tool caddy is clamped in place along the right side of the table top by means of runners attached to the bottom of the caddy.
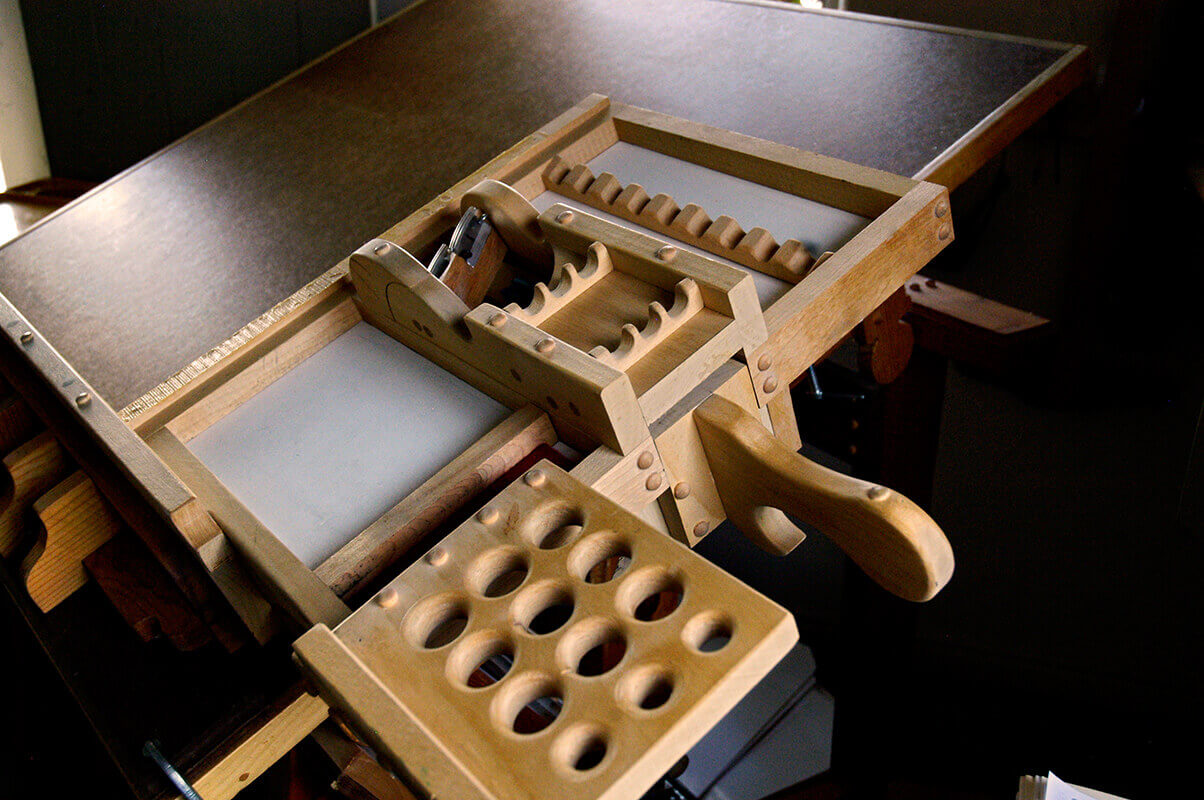
Another view of the hand rest and tool caddy.
Shown here, removed from its channel underneath the tool caddy, is the trough that catches shavings from the wax-pencil sharpener built into the caddy.
Here, the trough slides into place under the pencil sharpener. The upper edges of the sides of the trough are beveled to prevent shavings from accumulating there.
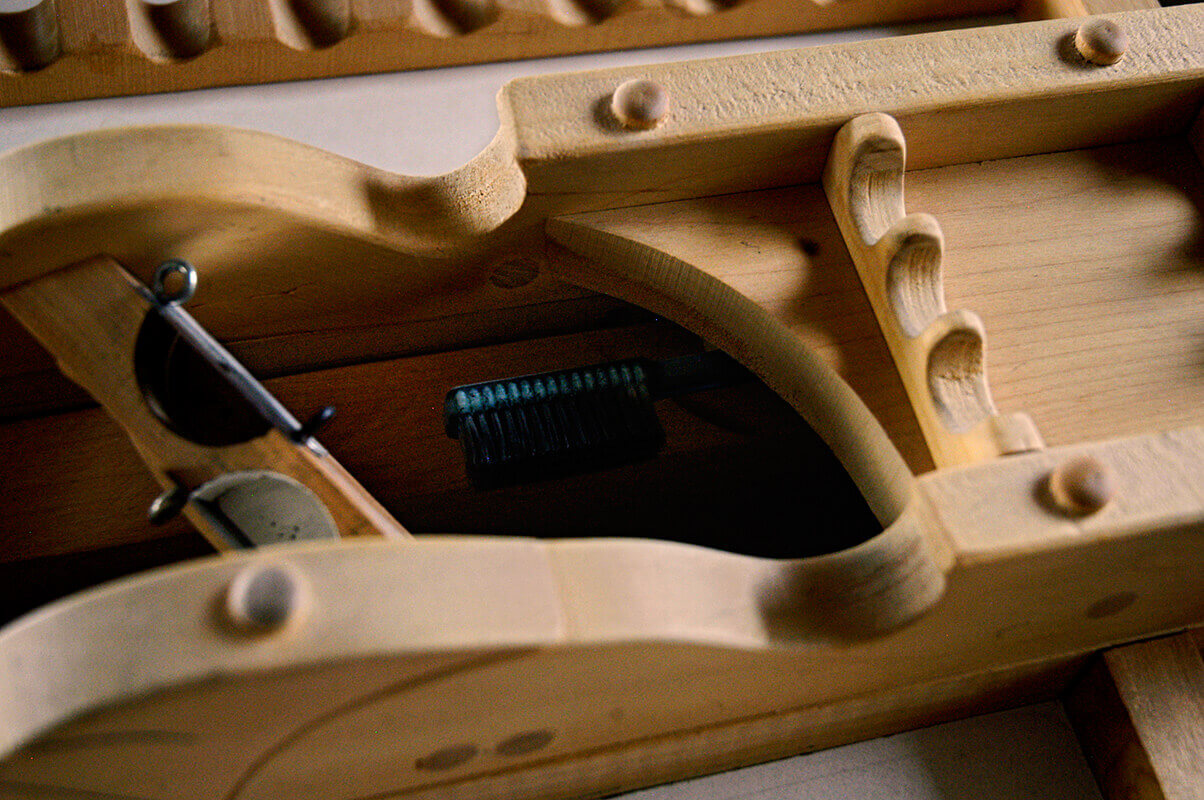
This view down into the wax-pencil sharpener shows the beveled edges of the trough for shavings, as well as the end of a toothbrush mounted on the underside of the sharpener and used to brush shavings away from the sharpened end of the pencil.
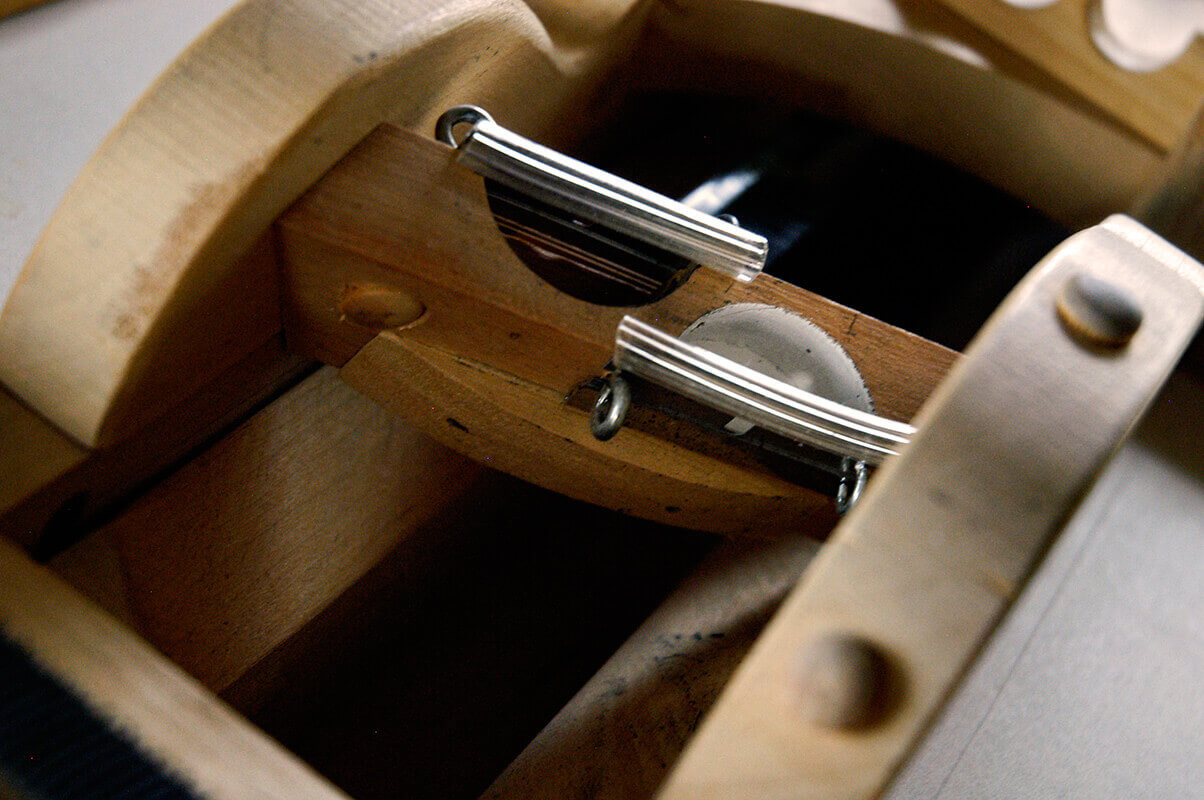
Razor blades, held in place by eye-screws mounted through the slots on each side of each blade, are covered (when not in use) with a length of plastic tubing, sliced along one side and mounted over the exposed edge of the blade. The photograph also shows that the wood cavity near which one of the blades is mounted is painted white. This provides a light background against which to view the end of the pencil while shaving its point along the blade.
In the shallow compartment at the bottom of the tool caddy is a stack of half-sheets of paper (8.5 in. x 5.5 in.) used to refresh the point on a wax pencil. The scratch paper is used in between the more radical sharpenings provided by the razor blades.
Immediately to the left of the perforated plate for pliers, scissors, and tools, is a felt-lined slot for a couple of knives. Vertically situated in the slot is a slightly rounded slice of wood to which the felt is mounted. This keeps the two knives on opposite sides of the slot, which helps ensure safety and concentration while working intently on a drawing and reaching for a sharp object.
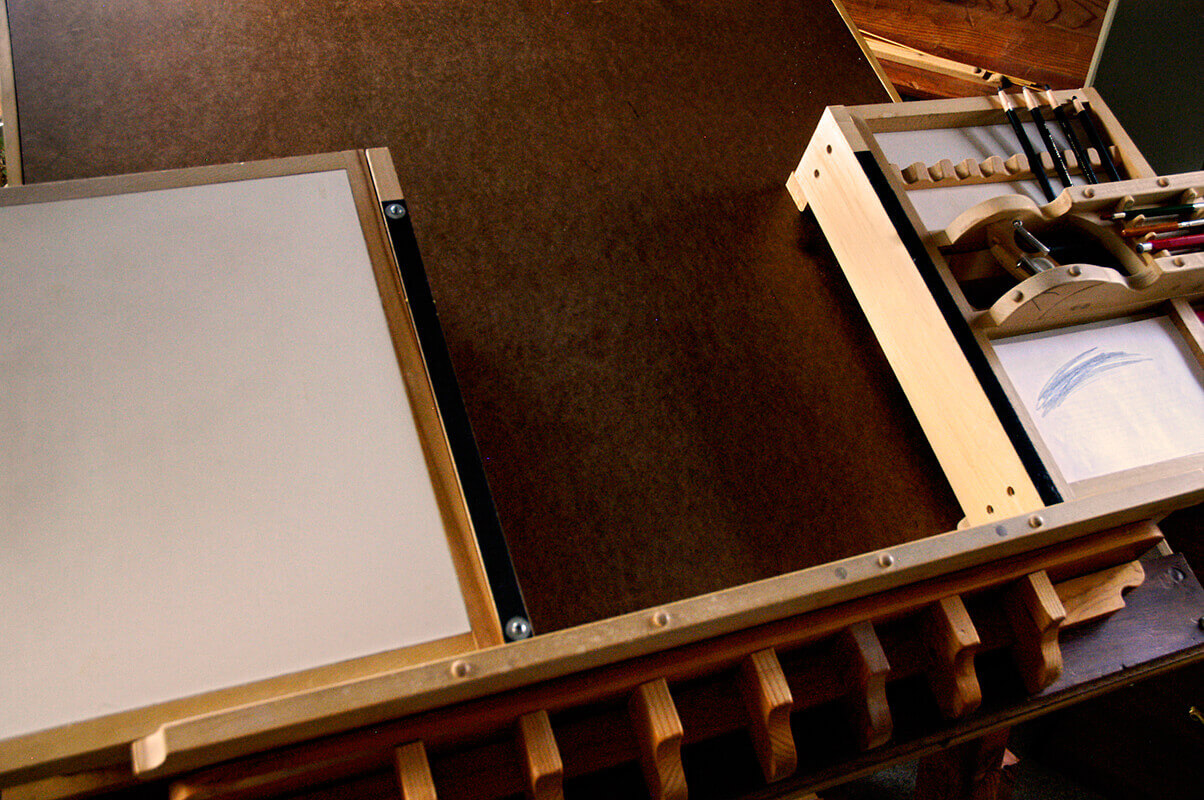
This close-up shows the runners by which the platform to the left of the stone is clamped to the left side of the table top. The surface of this platform is level with the top edge of the tool caddy.
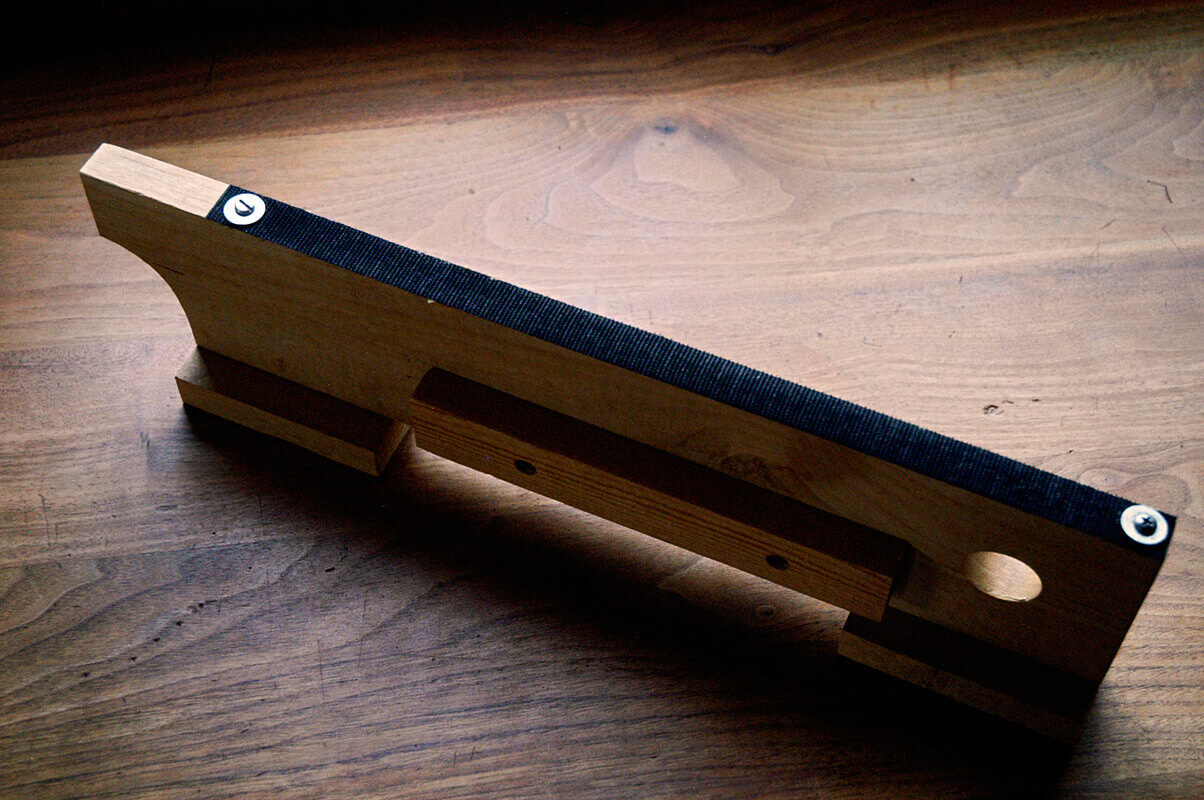
This is a Velcro-capped track that is placed along the left side of the stone. The Velcro is not only glued to the top of the board, but its ends are screwed in place (because glue proved insufficient by itself). The circular hole in the right side of the board is a finger-hole for convenience in the board's placement and removal.
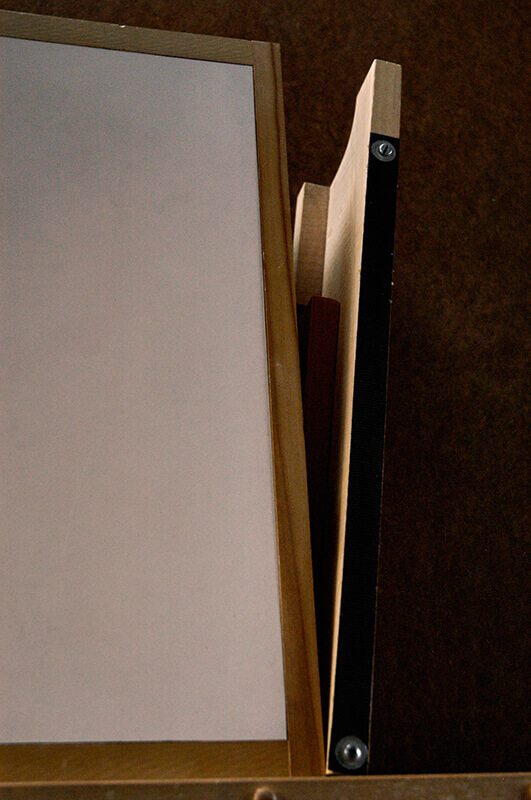
The Velcro-topped board is placed next to the platform along the left side of the cavity awaiting the stone. The horizontal length of 1-in. stock screwed to the side of the board (in the previous photo) holds this board in place against the action of the bridge that rests on this board (appearing in later photos).
In this wider shot, both Velcro strips are in place on either side of the stone cavity. Note that (as shown and remarked in the first series of photos at the beginning of this article) the stone does not rest against the hand-rest-plate running along the length of the ledge. Instead, two wooden blocks are placed as spacers against the hand-rest-plate to provide hand protection and space while moving the stone.
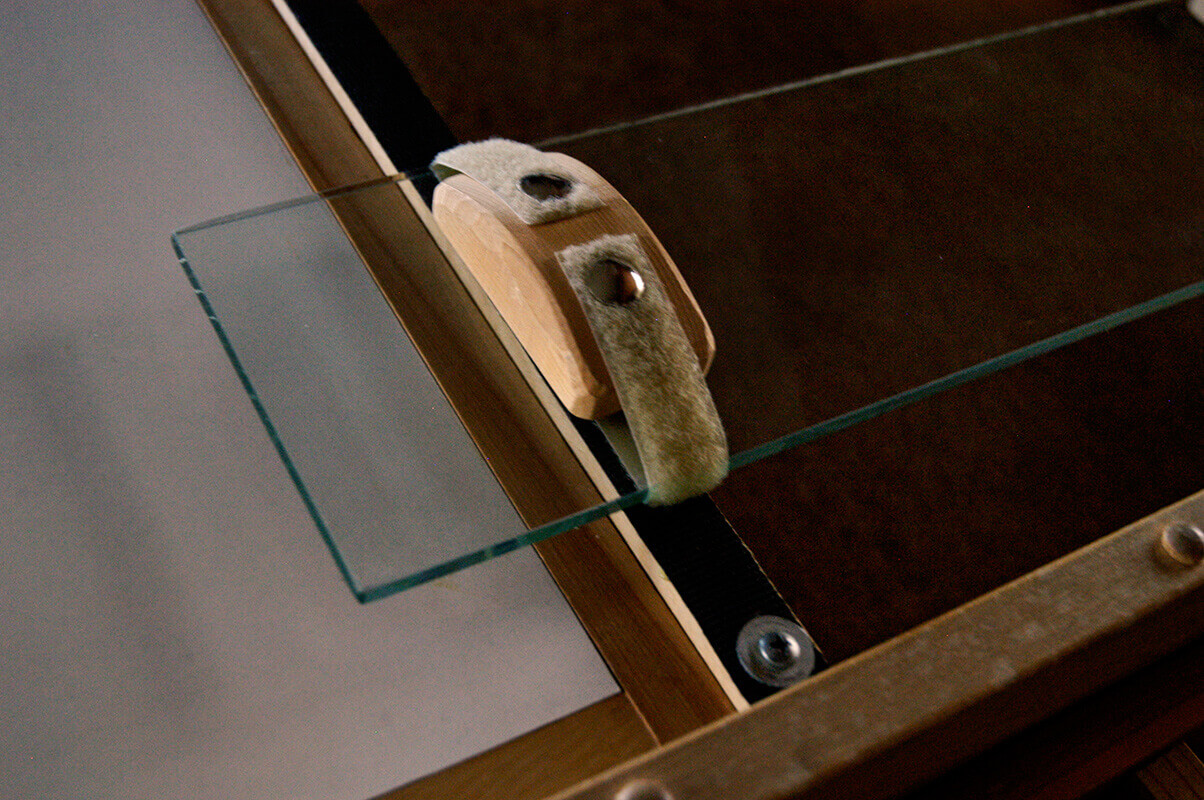
A quarter-inch thick length of glass spans the stone-cavity and serves as a bridge. Each Velcro strip is held in place on the glass by means of a rounded wooden block into which large thumbtacks hold in place the ends of a Velcro strip fitted snugly around the glass.
Not shown in these photographs are the wooden blocks (made of 1-in. stock) placed under the stone, with the table level. These blocks helped ensure that setting the stone in place gave space for fingers. They also enabled gripping the stone, prior to removing it, more securely and conveniently.