Creating faux hand-painted tiles
By Al R. Young
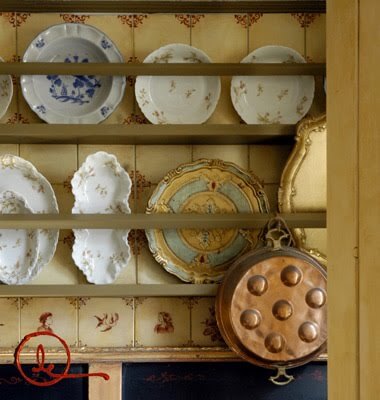 Elspeth hand-painted about 60 tiles for the Workshops project in our most current issue of the Journal: Vol 10 No 2 Mama's Bank Account. They match the tiles she painted for an earlier volume of the Journal: Vol 4 No 6 The Betrothed (I Promessi Sposi). Here are some tips for painting some faux tiles of your own to accent any wall in the home.
Elspeth used semi-gloss white latex interior paint to coat each tile two times. (Use a soft, natural bristle brush rather than a synthetic one in order to minimize brush-strokes.) The tiles were allowed to dry for several hours.
First, design a corner emblem. The traditional "oxtail" Delft motif is very simple and can be traced from examples of the design found online. Elspeth's design is a more elaborate, Italianate version of the oxtail, involving more c-shape and teardrop flourishes. After you have chosen a motif for the corners, trace or sketch the shape to-size onto a piece of heavy paper. Place all the dried tiles side-by-side as they will appear on the wall. (You may wish to number the back of each tile.) With a stick of soft compressed-charcoal, mark the outside of the tile corner lengths on each tile to ensure that even when each corner is free-handed, it is approximately the same size.
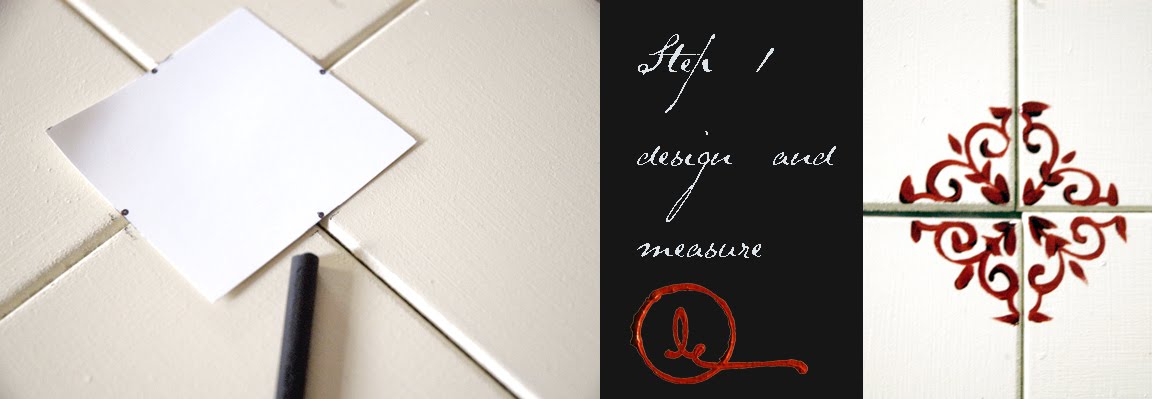 If four tiles will touch, you can mark the out-side edge for each tile corner simultaneously, using a sheet of paper cut to four-times the size of one tile corner motif, see picture above.
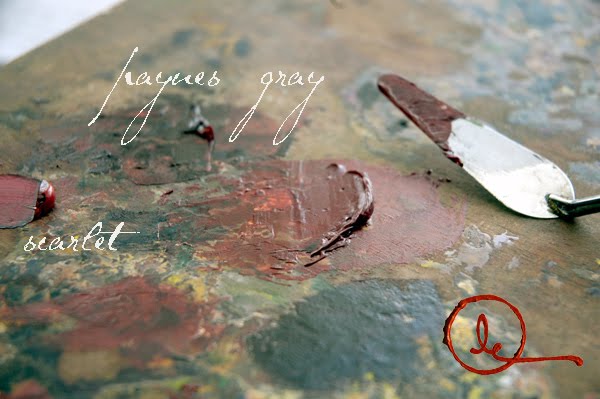 Elspeth used oil paints, but craft paints would also do. The oil paints look richer, but if dry-time is an issue, you may wish to choose craft paint or tube acrylic paint. Elspeth used scarlet mixed with a little bit of payne's gray and ultramarine blue to create the deep-red mixture. A pretty blue and white Delft-style color can be mixed using cobalt, ultramarine blue, and payne's gray.
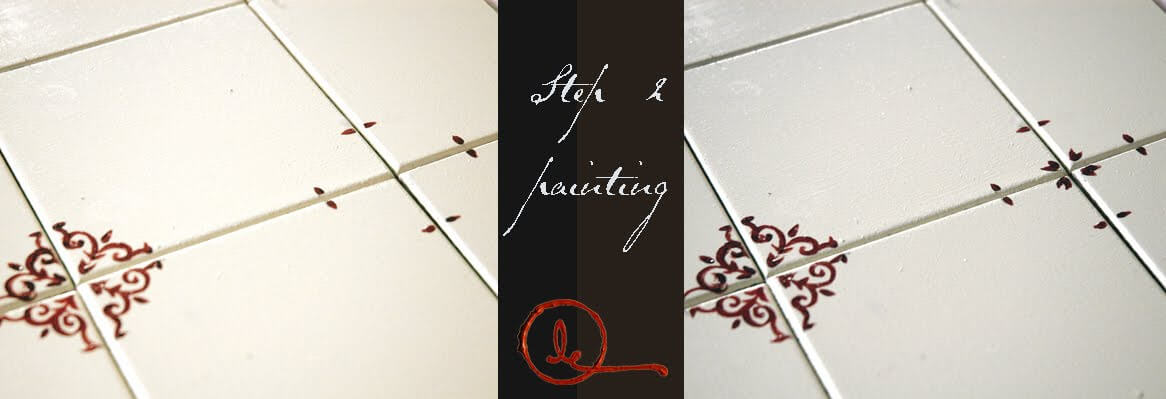
Next, hand paint each corner. You can paint each corner individually, one at a time, or you can paint four corners at a time by painting one element from the motif four-at-a-time, shown above.
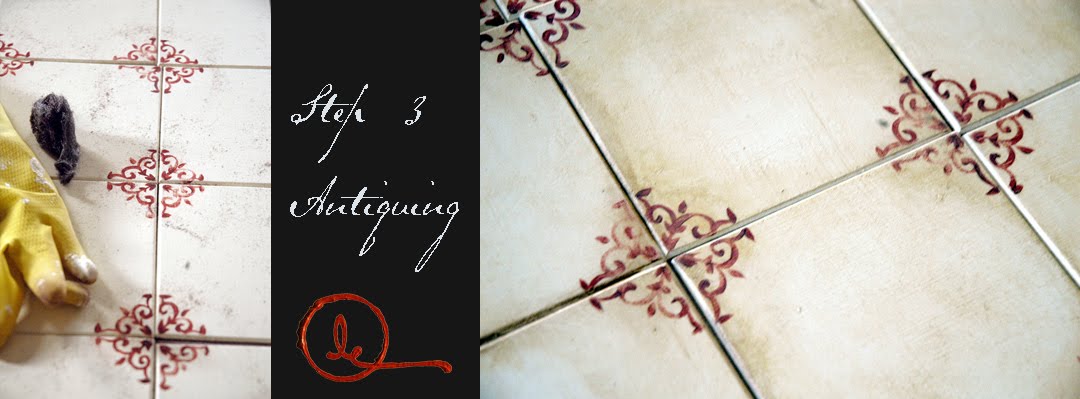
Once the tiles have been allowed to dry (two hours for acrylic paint, forty-eight hours for oils) the tiles can be antiqued. Wearing gloves, steel wool the corner ornaments to rub away some paint here and there. Next, thoroughly wipe away excess steel wool and dust from the rubbed-away paint. Use a damp rag to completely clean the tiles. Use a mixture of yellow-ocher and raw-umber craft paint to add an antiquing glaze. Use a wet rag dipped in the ocher/umber mixture and wipes the tiles lightly with the glaze. Rub away undesired excess glaze. Allow to dry and repeat this process until desired effect is achieved, see picture below.
 Allow the tiles to dry for another hour. Add a coat of acrylic varnish to enhance the gloss of the tiles, completing the faux effect.
Tags: 2010, Hand crafts
Browse articles by year: 2026 . 2025 . 2024 . 2023 . 2022 . 2021 . 2020 . 2019 . 2018 . 2017 . 2016 . 2015 . 2014 . 2013 . 2012 . 2011 . 2010 . 2009 . 2008 . 2007 . 2006 . 2005 . 2004 . 2003 . 2002 . 2001 . 2000 . 1999 . 1998 . 1997 . 1996
Browse articles by topic: Art lessons . BenHaven Archives . Blank art diaries . Fine art photography . Framing . Illustration . Inspiration and creativity . Isles of Rune . Limited Editions Collection . My Fathers Captivity . News . Novellas . Oil paintings and prints . Operations announcements . Orders and shipping . Overview . Portfolios . The Papers of Seymore Wainscott . Project commentaries . Recipes by Nancy Young . Recommended reading . Recommended viewing . Temple artworks . The Storybook Home Journal . Tips and techniques . Tools supplies and operations
Browse articles by topic: Art lessons . BenHaven Archives . Blank art diaries . Fine art photography . Framing . Illustration . Inspiration and creativity . Isles of Rune . Limited Editions Collection . My Fathers Captivity . News . Novellas . Oil paintings and prints . Operations announcements . Orders and shipping . Overview . Portfolios . The Papers of Seymore Wainscott . Project commentaries . Recipes by Nancy Young . Recommended reading . Recommended viewing . Temple artworks . The Storybook Home Journal . Tips and techniques . Tools supplies and operations