An oversize easel that leans against a wall
By Al R. Young
I built the Diptych Easel several years ago in order to complete a commission to create an entablature featuring a diptych consisting of two, 4 ft. x 8 ft. painted panels. Even though the easels were created for a specific commission, the design can be modified or adapted as needed.
Each of the two matching easels in the set leans against the wall. And since the lightweight framework of each easel is (when in use) clamped to the back of a 4 ft. x 8 ft. sheet of 5/8-in. plywood, the plywood doesn't so much rest on the easel as become part of its structure and stability.
I might have simply leaned each plywood sheet for the diptych against the wall of the studio, but I wanted to get the panels up off the floor so that I might paint more conveniently. Unused wall space in the studio was also a premium, which is part of the reason the top of each easel stands 2 ft. out from the wall -- allowing access to windows and furniture behind the paintings.
The following diagram shows the front view of the top part of each easel. Building each easel in two parts (an upper unit and a lower unit) simplified the problem of storing the easels when not in use. This two-unit approach also made it possible to use 8-ft. long stock (readily available at home centers) to achieve more than 8 ft. of height in the framework..
The top unit consists of five pieces that are fastened together by nut-and-bolt so that disassembly is simple, and does not damage (weaken) the framework. These pieces include: Two vertical sides, two braces constituting the X between the uprights, and a single brace mounted across the top of the easel.
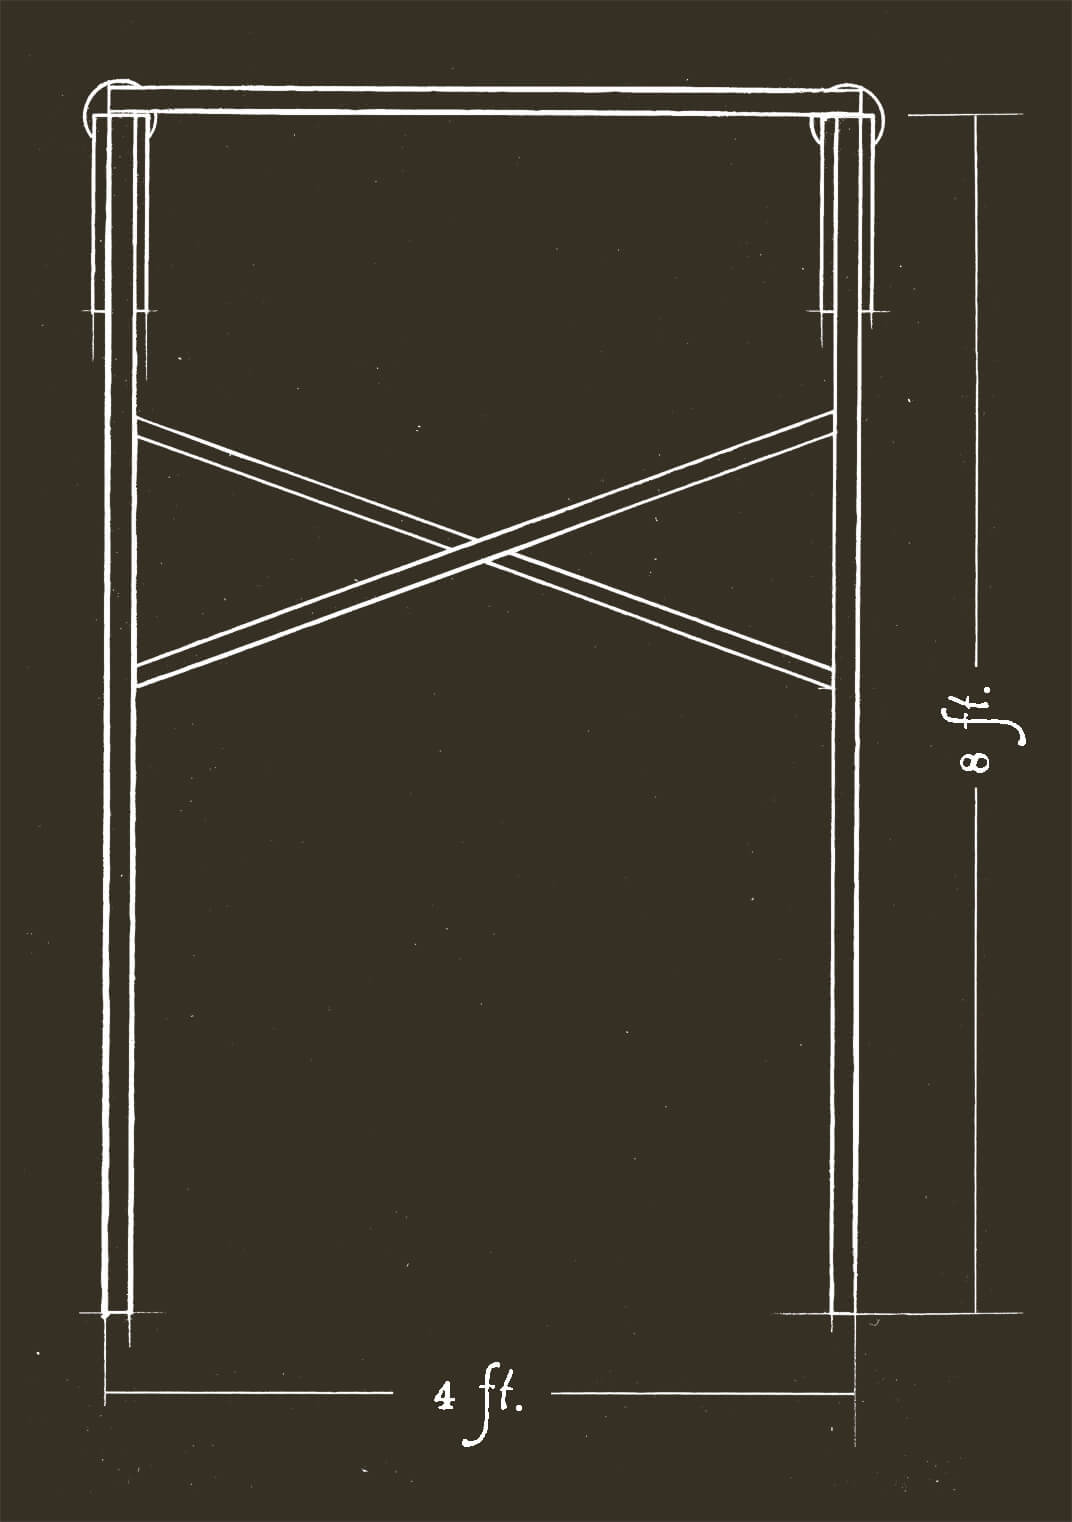 |
| Front view of top unit |
The 1x2 upright of each side is perpendicular to the plain of the panel.
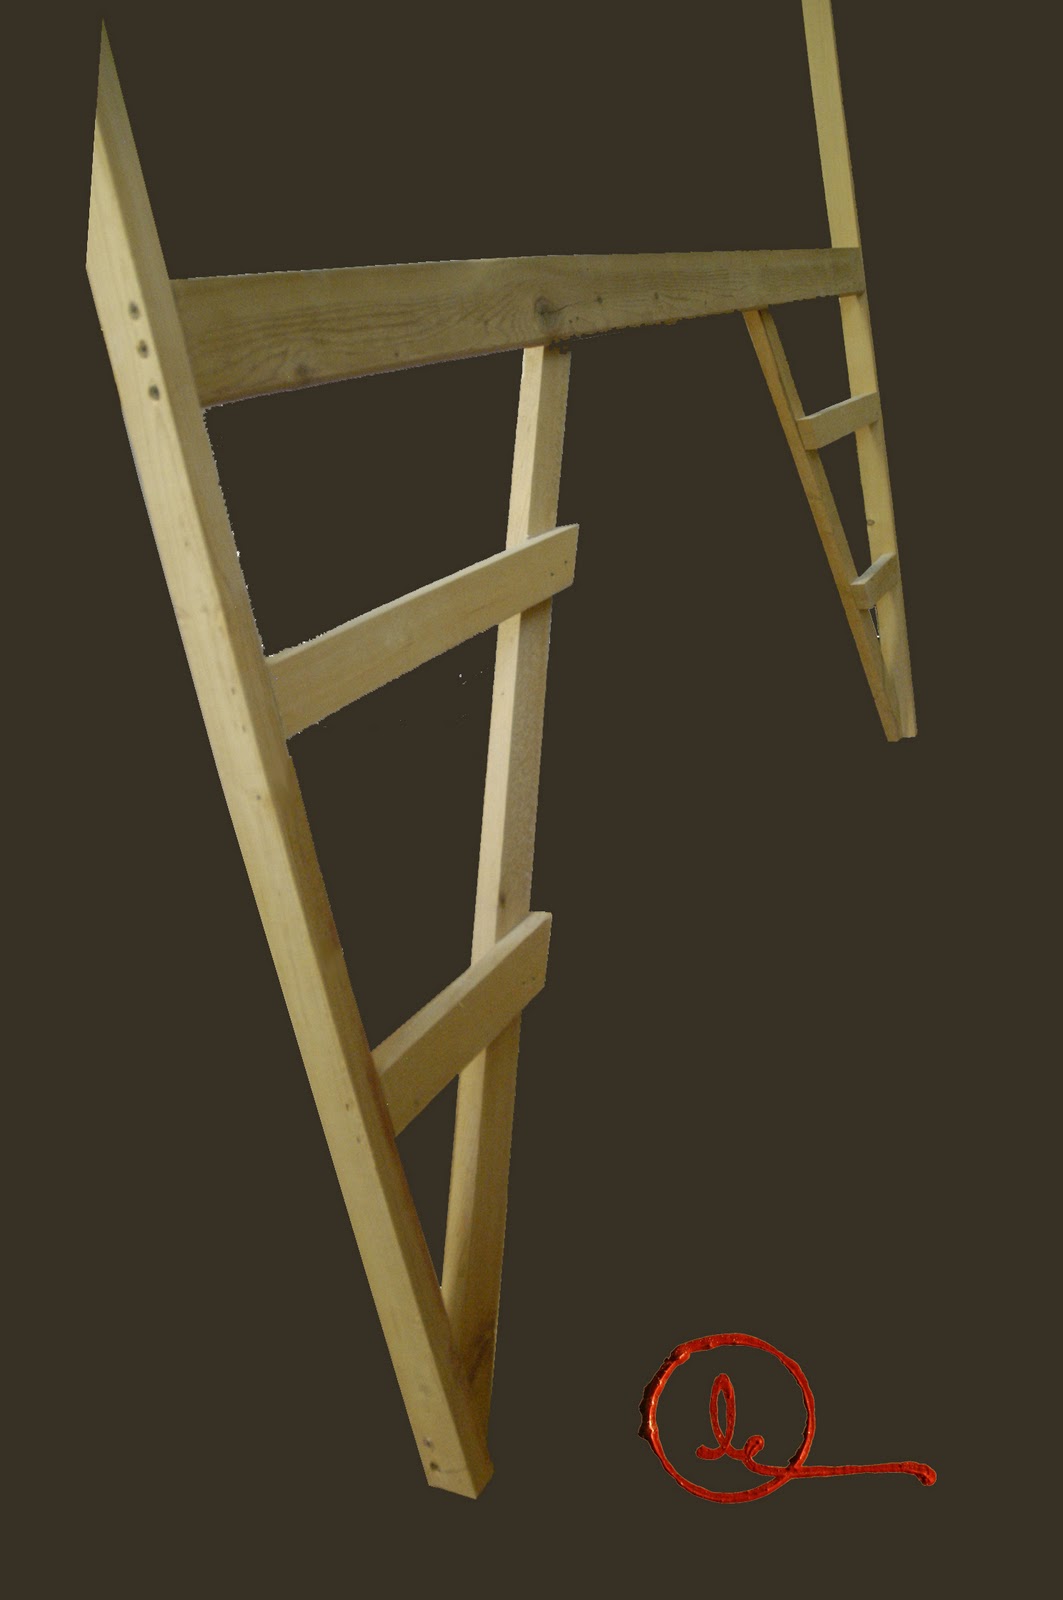
The following photographs show the fixed arms, atop each vertical side, that rest against the wall. The elbow for each of these arms is sandwiched between two pieces of 1/4-in. hardboard, glued and stapled to the 1x2s of the vertical and horizontal members.
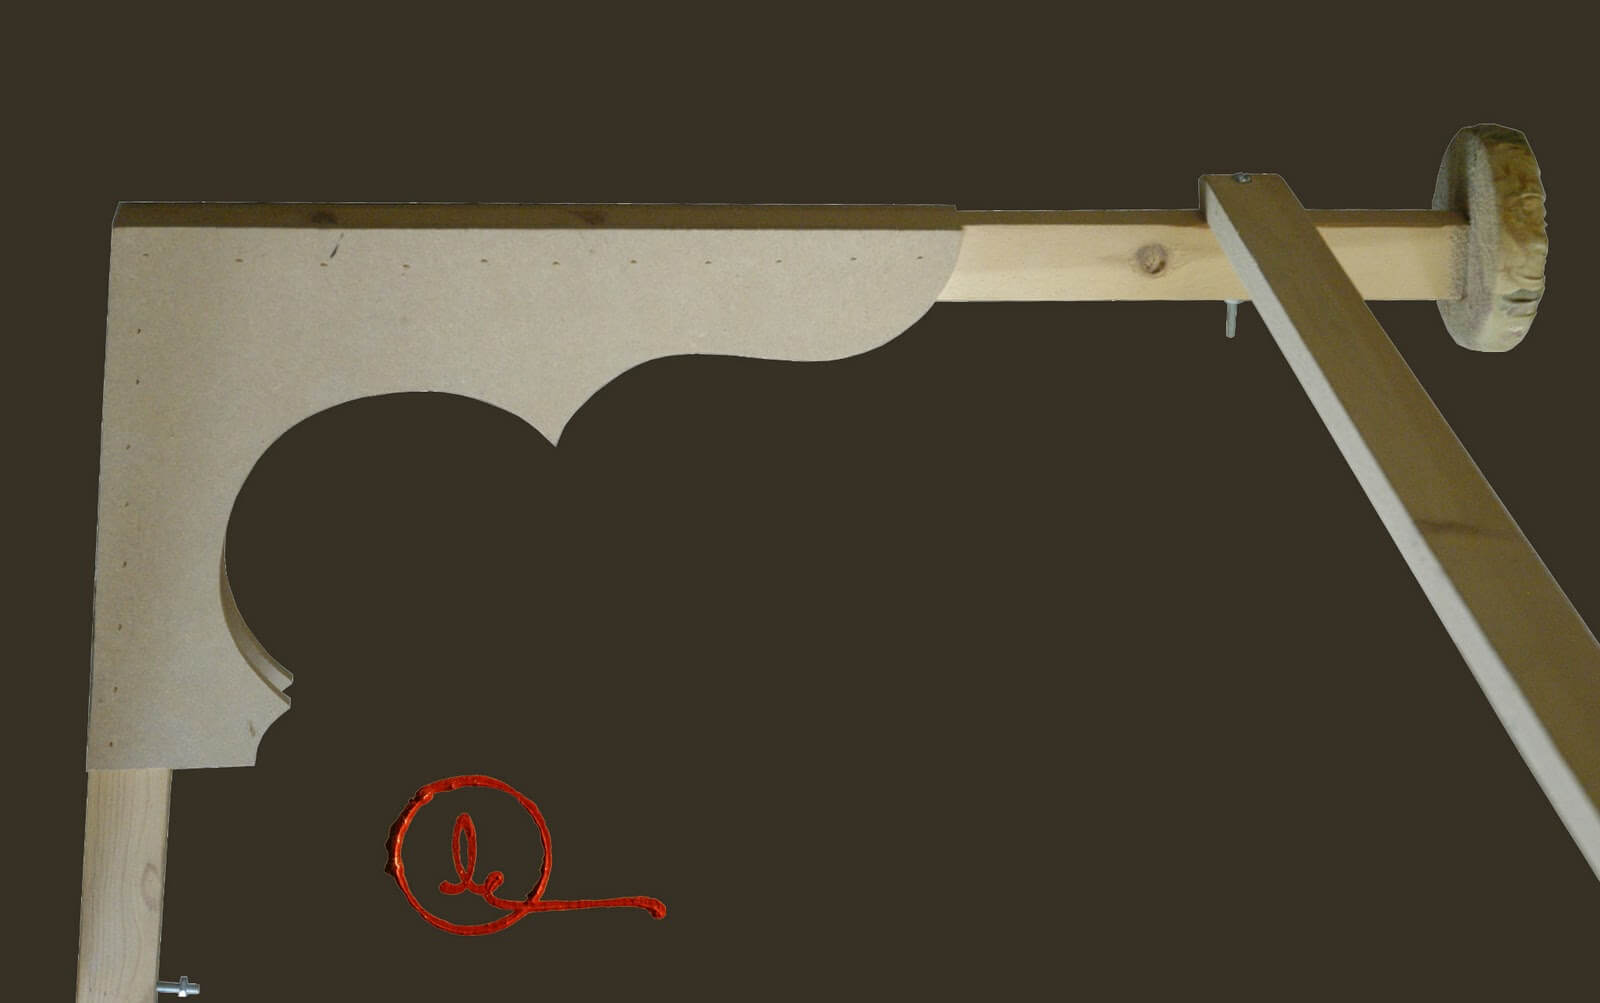 |
| The angle at the elbow (at the upper left of the image) is 94 degrees |
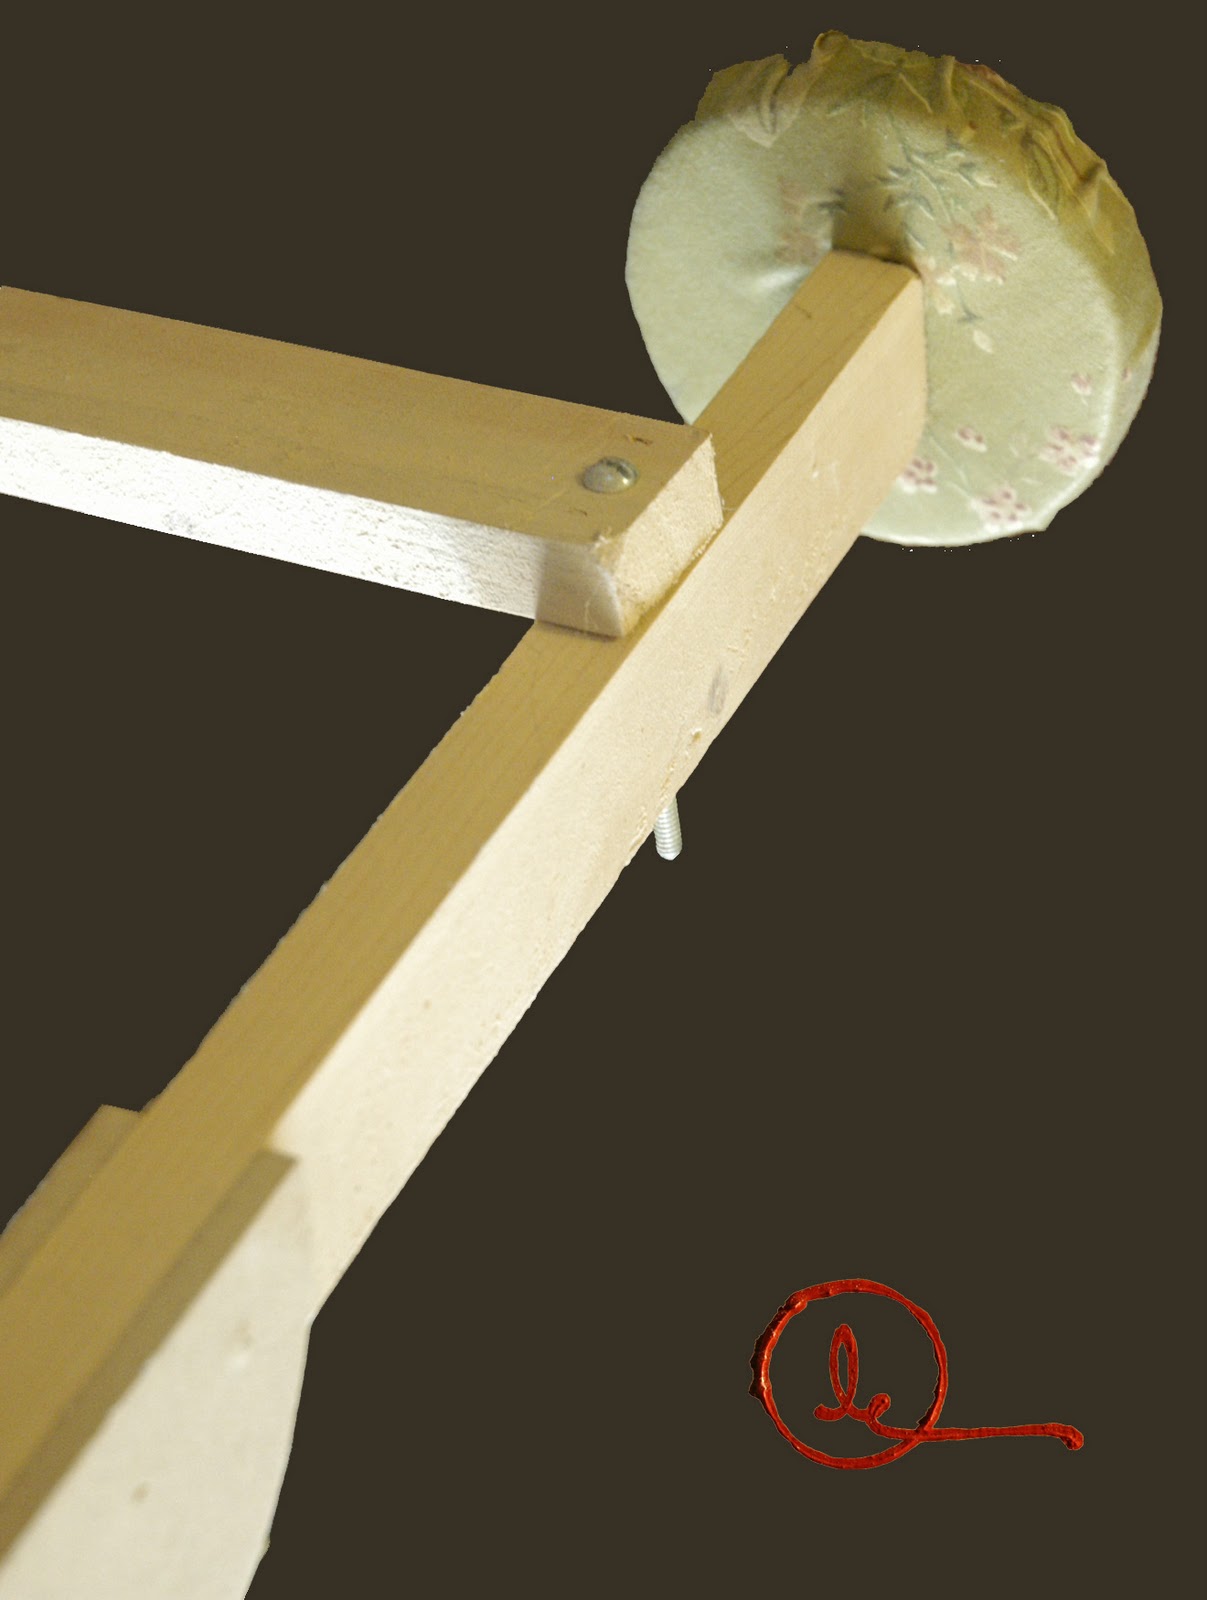 |
| Detail of the horizontal arm atop each vertical side |
The disk resting against the wall at the back of each arm is covered in cloth to protect the wall. The disk is fastened by a grab screw installed in the center of the disk.
The following diagram is a front view of the base unit for each easel.
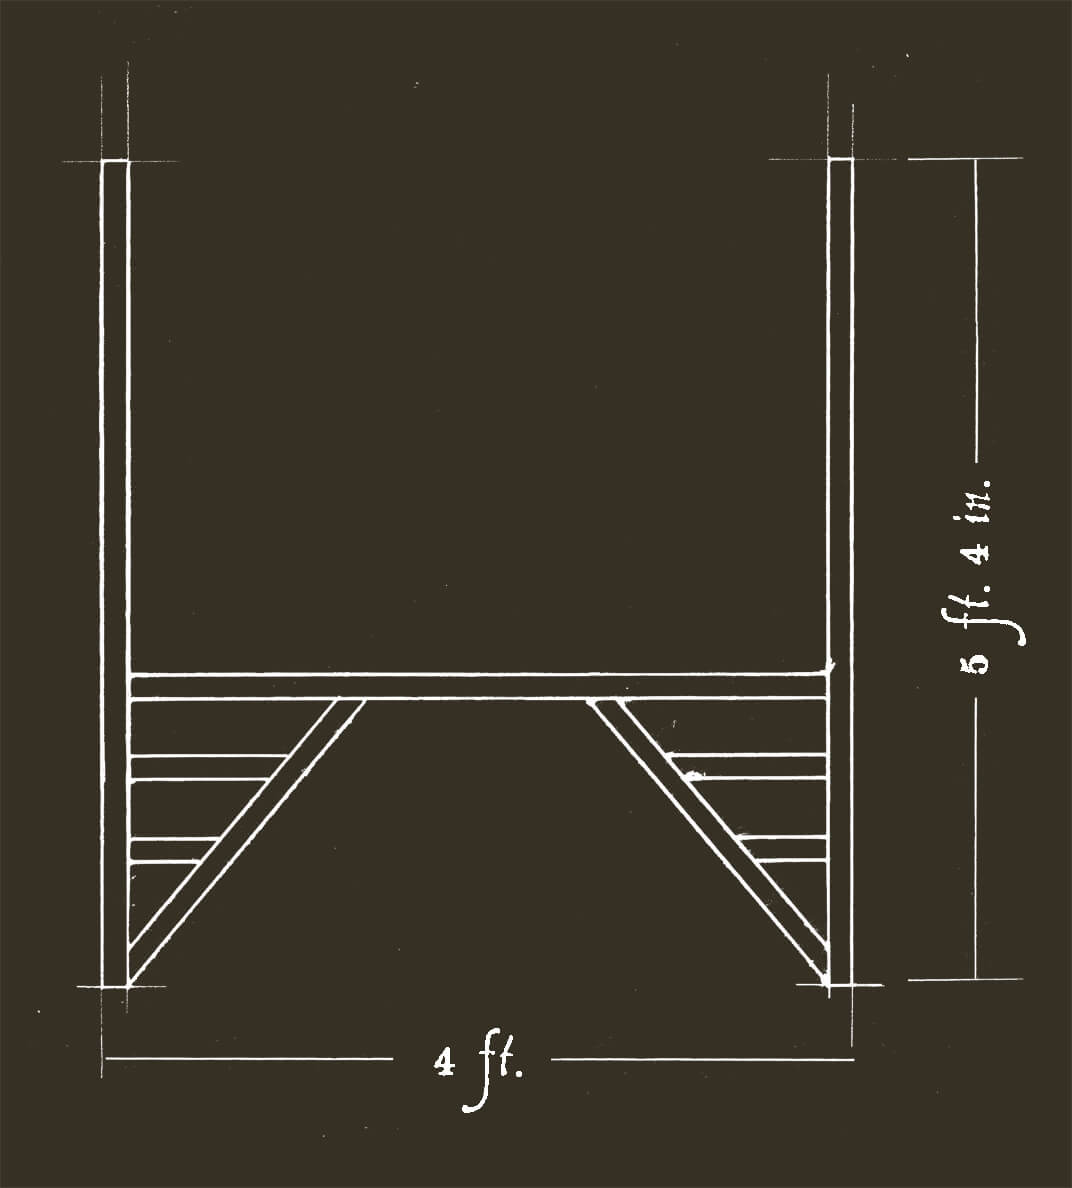
The following photograph presents a detail view of the assembly of the 1x2s and 1x3s of the base.
C-clamps (see the following photograph) were used to secure each panel to its easel. The cord draped over each X-brace was secured to the wall as a precaution against the easels being pulled away from the wall.

Browse articles by year: 2026 . 2025 . 2024 . 2023 . 2022 . 2021 . 2020 . 2019 . 2018 . 2017 . 2016 . 2015 . 2014 . 2013 . 2012 . 2011 . 2010 . 2009 . 2008 . 2007 . 2006 . 2005 . 2004 . 2003 . 2002 . 2001 . 2000 . 1999 . 1998 . 1997 . 1996
Browse articles by topic: Art lessons . BenHaven Archives . Blank art diaries . Fine art photography . Framing . Illustration . Inspiration and creativity . Isles of Rune . Limited Editions Collection . My Fathers Captivity . News . Novellas . Oil paintings and prints . Operations announcements . Orders and shipping . Overview . Portfolios . The Papers of Seymore Wainscott . Project commentaries . Recipes by Nancy Young . Recommended reading . Recommended viewing . Temple artworks . The Storybook Home Journal . Tips and techniques . Tools supplies and operations
Browse articles by topic: Art lessons . BenHaven Archives . Blank art diaries . Fine art photography . Framing . Illustration . Inspiration and creativity . Isles of Rune . Limited Editions Collection . My Fathers Captivity . News . Novellas . Oil paintings and prints . Operations announcements . Orders and shipping . Overview . Portfolios . The Papers of Seymore Wainscott . Project commentaries . Recipes by Nancy Young . Recommended reading . Recommended viewing . Temple artworks . The Storybook Home Journal . Tips and techniques . Tools supplies and operations